Resources
Instructor Tutorials
Everything you need to set up a course, build oral assessments, and grade them — each tutorial has a short video and written steps you can follow at your own pace.
New to RhetorixLab? Start here.
The four steps that take you from nothing to a graded assessment. About 15 minutes of video total.
Step 2 depends on one question: are you using an LMS?
Yes — Canvas, Blackboard, or Moodle
Link assessments to LMS assignments over LTI. Students launch from your course; no enrollment key needed and grades flow back.
Go to LMS integration →No — I'll use RhetorixLab on its own
Add students to the roster by email, then share your course enrollment key so they can join.
Go to manual enrollment →All tutorials
5 videos · 18 minutes total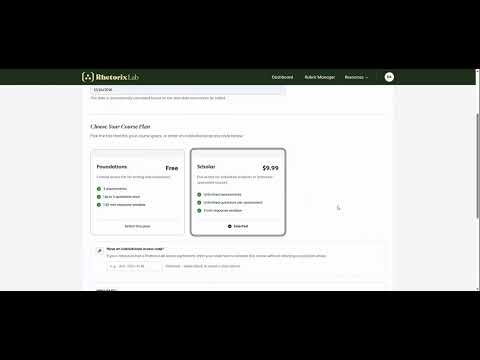 2:05
2:05How to Create a Course
 1:49
1:49Manually Enrolling Students
 3:58
3:58Connecting to Canvas (LTI)
 5:40
5:40Creating Assessments
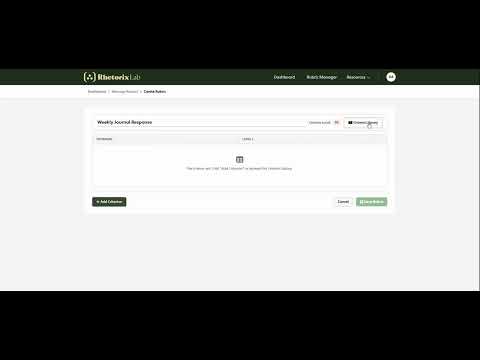 5:12
5:12Using the Rubric Builder
Randomization, attempts, accommodations & more
Jump straight to the moment in a video where a specific feature is covered.
1 Set up your course
How to Create a Course
Use this when you're setting up a brand-new course, or want to understand the plan and payment options before committing.
Steps
- From the main dashboard, click Add Course. (If you reach RhetorixLab through an LMS, you land on this screen automatically.)
- Enter your course name.
- Set the start date — the first day students should be able to access material. You can still edit the course before that date.
- Choose a course plan: Foundations (free) or Scholar (paid).
- Choose who pays: Student pay, or Instructor sponsored.
- If your institution has an access agreement, enter your institutional access code instead — this skips the plan and payment steps entirely.
- Click Save Course. It's now ready for assessments.
Key details
- Course end date
- Auto-calculated as 125 days after the start date. Contact the RhetorixLab team if you need it changed.
- Foundations
- Free · 3 assessments · up to 5 questions each · 1:30 response window
- Scholar
- Paid · unlimited assessments and questions · 3:00 response window
- Student pay
- Students are prompted to pay after completing 3 assessments.
- Instructor sponsored
- You enter card details; charged 14 days after the course start date, based on enrollment.
Manually Enrolling Students
Use this when you're running RhetorixLab standalone, without Canvas, Blackboard, or Moodle.
Steps
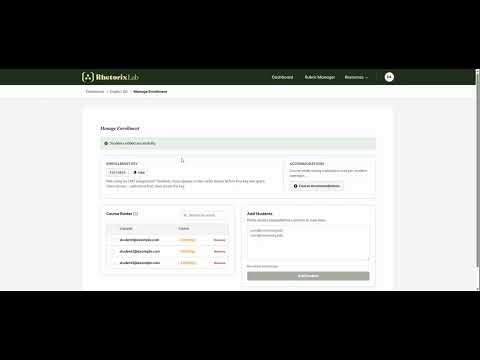
- Open your course and go to Manage Enrollment.
- In the Add Students box, paste student email addresses separated by commas or new lines.
- Check the validated count, then click Add Students.
- Copy the Enrollment Key and share it with your class.
- Students appear in the Course Roster with a Pending status until they join.
Watch out for
Without an LMS integration, students must already be on the roster before the enrollment key will grant them access. Add them first, then share the key — sharing it early is the most likely cause of "my key doesn't work" emails.
Also on this screen
Course Accommodations — set course-wide timing multipliers and per-student overrides for students who need extra time.
Connecting to Canvas (LTI)
Use this when you want students to launch assessments from inside your LMS course, with no separate enrollment step.
Steps
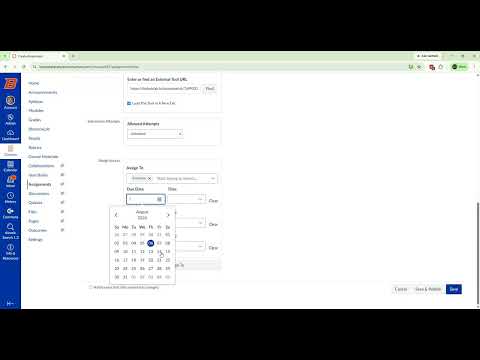
- In Canvas, go to Assignments and click + Assignment.
- Fill in the name, points, and assignment group as you normally would.
- Set Submission Type to External Tool, then click Find.
- Choose RhetorixLab. The Link Resource from External Tool dialog opens.
- Select an existing assessment, or click Create Assessment to build a new one.
- Save the assignment. Students launch it from Canvas, you grade through RhetorixLab and then sync grades to the LMS.
2 Build your assessments
Creating Assessments
Use this when you're writing questions, setting timing, and deciding how questions get delivered to students.
Testing mode vs. Open mode
| Feature | Testing mode | Open mode |
|---|---|---|
| Prep time | Fixed timer per question | Unlimited |
| Recording starts | Automatically at 0:00 | Only when the student clicks record |
| Best for | Replicating a live oral exam | Reflective, open-notes responses |
Steps
- From the course homepage, click Create New.
- Enter an assessment name, and optionally instructions for students.
- Set the open and close dates.
- Choose the assessment mode — testing or open (see the comparison table).
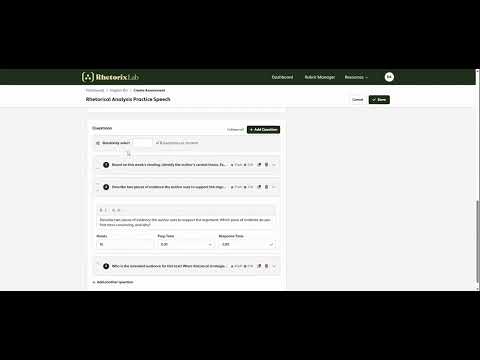
- Choose how questions are delivered: all questions, a random selection, or drawn from question pools.
- Click Add Question and write each question. Set points, prep time, and response time for each.
- Click Save.
- Open the ⋮ menu and choose Preview to run through the assessment exactly as students will see it.
Time-saver
Set points, prep time, and response time once as defaults, and every question you add afterwards inherits them — rather than editing each question by hand.
Three ways to deliver questions
- All questions
- Every student answers everything you've written.
- Random selection
- Each student gets N of your M questions, chosen at random.
- Question pools
- Group questions into categories and set how many to draw from each.
3 Grade and give feedback
Using the Rubric Builder
Use this when when you're preparing grading rubrics. Define your own criteria or select from our Criteria Library.
Steps
- Go to Rubric Manager → Create Rubric.
- Name the rubric.
- Click Add Criterion, then give it a name and description.
- Set the criterion's weight. The Criteria total indicator must reach 100%.
- Add performance levels (e.g. Exceeds / Meets / Approaching / Below), each with a description and a score percentage.
- Or open the Criteria Library, pick a Starter Set, and click Import Set to Rubric to skip writing criteria from scratch.
- Click Save Rubric, then attach it to an assessment question.
- Open the Grade Sheet and click Grade on a question to score responses against the rubric.
Also worth knowing
Communication Analytics sits on the tab next to the Grade Sheet, and rubrics can be swapped per question via Change Rubric.
Find a specific topic
Looking for one feature rather than a whole walkthrough? Jump straight to the moment it's covered.
| Topic | Covered in | Jump to |
|---|---|---|
| Question randomization & pools | Creating Assessments | 1:11 |
| Clearing a student's attempt | Creating Assessments | 3:17 |
| Accommodations & extra time | Creating Assessments | 3:26 |
| Previewing as a student | Creating Assessments | 3:41 |
| Grading & the Grade Sheet | Using the Rubric Builder | 4:30 |
| Communication Analytics | Using the Rubric Builder | 5:00 |
| Course plans & who pays | How to Create a Course | 0:42 |
| The student experience | Student Tutorials page | View → |
Have questions?
Email the team and we'll get back to you.